9 Steps to Create Beautiful Entourage in Revit
The default character entourage in Revit are weird and ugly. Why would you want to see a cross shaped human in your views? In this tutorial, you will learn how to modify the default entourage to make it more interesting. Shout out to architect Steven C Shell, who inspired the idea.
If you prefer video tutorials, check this out:
1- FIND INTERESTING CHARACTERS IN AUTOCAD FORMAT
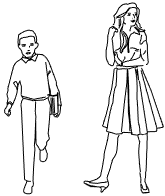
Your first step should be to find interesting characters in the DWG families. This task should be pretty simple when using Google properly. Try typing something like “AutoCAD entourage”.
Make sure to clean the DWG file with purge and remove all useless lines. Each human should be in a separate file. Then, edit the default Revit entourage family.
Maybe you are reading this fancy post and thinking:” I am a busy person, why would I waste hours creating entourage families? Can I buy them instead?” The answer is yes. Our DESIGN learning package includes 10 custom and gorgeous entourage families.
2- IMPORT DWG IN THE ENTOURAGE ELEVATION
Once you are inside the default entourage family, go to the Front Elevation view. You will see the weird cross 3D element. Import your DWG file containing the human silhouette. Make sure “Current View Only” is not checked. Set the feet of the DWG shape to match the bottom of the existing 3D silhouette.

3- MODEL EXTRUSION BASED ON HUMAN SILHOUETTE
Now, this is the boring part. You have to model an extrusion based on the edges of your DWG file. You can try using the Pick Lines tool to save some time. Depending on the AutoCAD file. It might work well, but with some DWG you might be forced to manually draw some of the purple boundary lines. Click the green check to complete and set the extrusion thickness at around 10mm.

4- SET A MATERIAL PARAMETER TO THE EXTRUSION
Select the extrusion you’ve just created and click on the small rectangle next to the Material parameter. Create a new parameter. This will allow you to select a specific material once the family is inserted in the project.

5- SET VISIBILITY PARAMETER TO BOTH 3D ELEMENTS
Here is the beauty of this family: when creating a rendering or a realistic view, you can activate the RPC cross shaped element, which will produce an image rendering. When you want to use a simple silhouette for shaded views, just turn on the extrusion you’ve just created. To achieve this goal, create visibility parameter for both elements.

6- MOVE EXTRUSION AND DWG FILE TO THE ORIGIN
You want all the elements to be located at the origin of the family. Select the extrusion and the DWG file and set them to match the RPC cross shaped 3D element. Then, go to plan view and set the extrusion and DWG file to match the central reference plane.

7- DUPLICATE DWG, SET VISIBILITY PARAMETER
Copy an instance of the DWG file to the other side of the extrusion. This way, the CAD lines can be visible from either side of the entourage person. Then, assign a new visibility parameter to both DWG instances. This way, you can decide if you want the 2D lines to be visible or not once inside the project.

8- LOAD INTO PROJECT, TRY DIFFERENT STYLES
Time to load your family in your project and create an instance of it. Try playing with the materials and the visibility of parameters. Each view might require a different entourage style. Sometimes a black silhouette is enough. In other views, you might want to activate the DWG 2D lines to see more human details.
Style #3 is using a material with 20% transparency. Make sure to experiment with the family until you find a style you like.

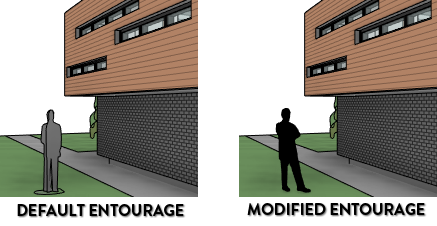
As you can see below, the modified entourage families create an interesting, mysterious atmosphere in the 3D view.

9- ACTIVATE RPC VISIBILITY FOR RENDERING
To create renderings or realistic views, turn off the Silhouette and DWGs, then activate the RPC visibility. As you see, the cross-shaped elements will be transformed into an actual image. Let’s be honest: these characters are not very good looking... but they can be useful when combined with a plug-in like Enscape.

Maybe you don’t want to waste your time creating entourage families? Well you’ve come to the right place. Download our DESIGN package and get 10 custom, beautiful entourage families. Children, ladies, bros, families, ninjas: we got them all.

The DESIGN package will teach you how to use Revit for design and presentation purpose. It contains an eBook, video tutorials, a template, a bunch of families and a 30 days license for Enscape. Click here to check it out. Or download a sample chapter about creating gorgeous 3D views by visiting Revit Pure’s site here.