
Control Visibility of Plumbing Fitting Tick Marks in Revit
This post was republished from Applying Technology to Architecture's blog and reposted here with permission.
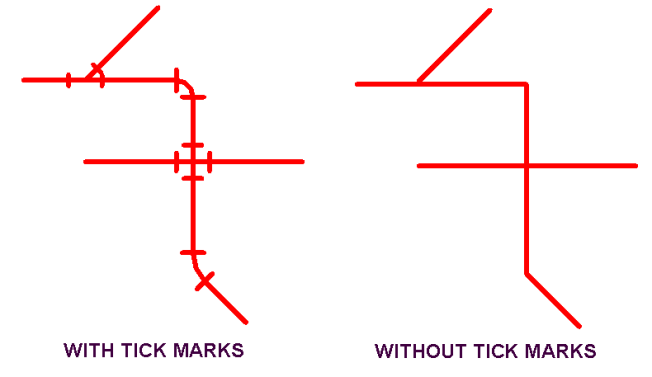
Single line drawings in Revit plumbing plans (Coarse and Medium displays) show the tick marks for fittings by default. Some design firms prefer to not show tick marks for the elbows, tees, and other fittings. Revit has a setting that allows users to adjust the printed size of the tick marks, but this affects all tick marks for all fittings. I see situations where the designer wants to see tick marks for reducers and couplers, but not some other fittings.
Pipe fitting families can have a parameter added that controls the visibility of the tick marks. This allows the user to specify which fittings should show the tick marks and also allows tick mark visibility to be different for different projects.
Each Pipe Fitting family will need to be modified, but we will take a look at one family here.
The Process
(Note that the OOTB “Elbow – Generic.rfa” family from Autodesk will be used as an example.)
Open the desired Pipe Fitting family in the Family Editor.
Select the Family Types button from the Properties panel of the menu.

In the Family Types dialog box, pick the New Parameter button at the bottom left corner.

In the Parameter Properties dialog box, specify the following settings:
Name: Tick Marks Visible
Discipline: Common
Type of Parameter: Yes/No
Group parameter under: Graphics
Type parameter vs instance
This allows all occurrences of this type in the project to have the same appearance.

Pick the OK button to close the Parameter Properties dialog box.
The Tick Marks Visible parameter now appears in the Family Types dialog box with a checkmark for it.

If you desire that the tick marks not be visible by default, then remove the checkmark.
Go to the Project Browser and expand Floor Plans and double-click on Ref. Level to open that view.

In the graphics windows, highlight all of the graphics with a window selection.
Go to the Filter command in theSelection panel of the menu at the top. In the Filter dialog box, remove the checkmarks for all of the categories except for “Lines (Pipe Fittings)“.

Pick the OK button to exit the Filter dialog box. The tick mark lines will be selected although it may not look like it.
You can look at the Properties palette and see the quantity of lines that are selected. In this case, there are “3” selected.
In the Properties palette, pick the little icon to the right of the Visible parameter while the lines are selected.

In the Associate Family Parameter dialog box that opens, select the Tick Marks Visibleparameter.

The visibility of the tick marks for this family type in the project will now be determined by whether there is a checkmark in the Tick Marks Visible parameter.
Pick the OK button to exit the Associate Family Parameter dialog box.
Save the family and load it into your project.
You should give the family a unique name so that it does not get confused with the OOTB version from Autodesk.
Repeat this process for each Pipe Fitting family that you will use.
This post was republished from Applying Technology to Architecture's blog and reposted here with permission.
cover photo © unsplash


