
Revit Architecture: Embedding Walls
One of the neat features of Autodesk Revit Walls (and there are many) is that they can be embedded within other walls. So for example if you want to create a wall with “feature panels” such as this….
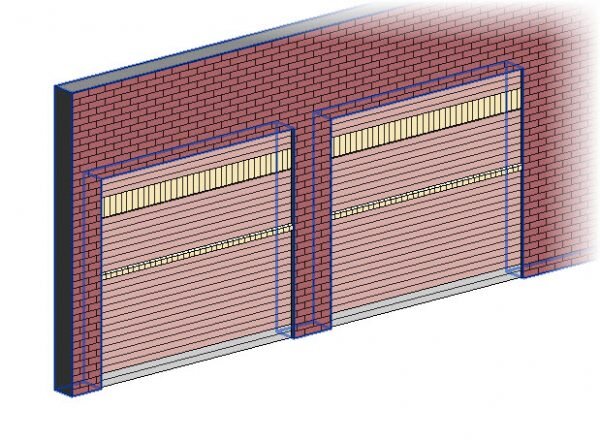
image © BIMscape
…it’s very easy to do using embedded walls. So let’s go ahead and take a look at how we do this. First of all I’m going to create a length of basic wall. The wall type isn’t important- this process of embedding will work with all wall types within Revit. So here is my first wall, shown in plan……

image © BIMscape
What we need to do now is simply add the wall that we want to embed, over the top of the first one. I will warn you now: When you do this, you will receive the following Warning Message……

image © BIMscape
This warning also tells us the secret to embedding walls within Revit Architecture, and that is the use of the “Cut Geometry” tool. So here are my two walls……

image © BIMscape
To add some clarity to the above image, I have selected the first wall (which is highlighted in blue), which then makes the second wall (shown in white) easily visible. So now we have two walls which simply overlap- as confirmed by the warning message that Revit presented to us.
To embed the smaller wall within the larger one, we need to use the “Cut Geometry” tool. This can be found on the Modify menu….

image © BIMscape
The “Cut Geometry” tool is a “two-click” tool. First you click on the wall that you want to cut (the larger wall)- marked as (1) in the image below. And then you click on the wall that you want to do the cutting with– marked as (2) in the image below…..

image © BIMscape
Upon completing the second click, the embedding operation will take place and your wall will now look like this….

image © BIMscape
We can clearly see that the larger wall now has a section cut out of it, to receive the small wall. This is even more clearly shown in 3D….

image © BIMscape
If you select the embedded wall, you can control its’s base and top with the triangular grips. It has all the same parameters as a non-embedded basic wall- ie you can control its base and top using Levels and base/top constraint offsets. It wall also host Revit doors and windows.
In exactly the same way, you can embed Revit Curtain Walls within basic walls. However, Revit Curtain Walls have the ability to “auto-embed” themselves at the time of creation. ie Once you have the main “host” wall in place, you can just define the length of Curtain Wall over the top and it wall cut the host wall and embed itself all in the same operation. To do this, you need to set the “Automatically Embed” parameter in the Curtain Wall Type Parameters.
First of all, select a section of curtain wall to make it’s Properties appear in the Properties Palette…..

image © BIMscape
And then hit the “Edit Type” button (highlighted in red in the image above). This will show you the Type Parameters for this wall type…

image © BIMscape
You’re looking for the second parameter in the list- the one called “Automatically Embed“. Just put a tick in the box for this parameter. In doing so, Revit will automatically detect when this wall type is created on top of another wall and will do away with the need to use the Cut Geometry tool.
This article was originally published on BIMscape and has been republished here with permission.

cover image © pexels


