
Line Weights for Custom Scale
This post was originally published on Enjoy Revit’s blog and has been republished here with permission.
Few weeks ago, a colleague of mine from the office asked me how to change the setting of line weights for custom scale.
To tell the conclusion first, you can't.
But there is something to be understood about it.
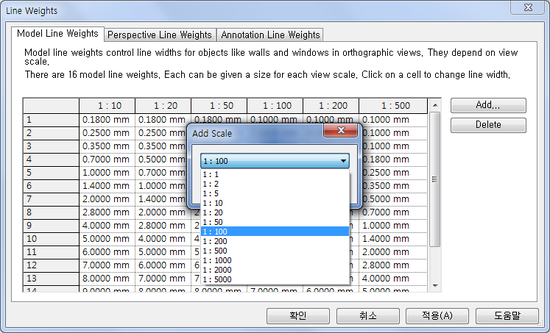
As known, Line Weight can be set only for default scales. But we are using various scales for various views. I've searched lots of threads in lots of Revit communities, but I couldn't find any clear answer. Someone says 'average' or other says 'nearest'..or so. Actually, I've also never thought about this issue seriously before. I'm not that sensitive guy, you know.
So I carried out a quick test to find out what happens in line weights in custom view scale.
Experiment
I just drawn a line with #5, and measured it's thickness in views with zoomed in.

The above image is the line in 1:100 scale, and it's measured about 50mm. It means the line will have 0.5mm thickness in a print out. I repeated the same in several custom scales.
Result
"It follows nearest scale setting"
For example, in a view with 1:300, it follows 1:200. In 1:400, it follows 1:500....
Then, in 1:350? It's at the exact middle of 1:200 and 1:500? The result says it follows smaller one, I mean 1:200.
So, I could make a simple table of Line Weight Setting for Custom Scales as follow.

Above is for the case which has a setting for all default scales. If not, the applying section will be changed.
Enjoy this tip and other Revit tips on Enjoy Revit’s blog found here.

cover photo © unsplash


