
7 Tips to Understand Slanted Walls in Revit
Revit 2021 introduced the new slanted wall feature. In the past you had to use the Mass feature, sometimes combined with the Curtain System tool. The new slanted walls feature is making it much more easy and convenient.
Here are some tips to get you started.
1. Set Wall Cross-Section to Slanted
To get started with slanted walls, switch the Cross-Section parameter from Vertical to Slanted.

2. Adjust the Angle from Vertical to Parameter.
Once the Slanted parameter has been assigned to Cross-Section, you will have access to the Angle From Vertical parameter. Pick a value between -90° and 90°.

You can also modify the angle by moving the boundary point of the wall.

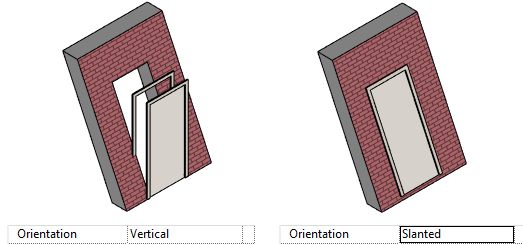
3. Adjust the Orientation Parameter for Windows and Doors

You can apply the same principle to doors, although slanted doors don’t make much sense.
Check out our popular BASICS learning package, the most fun and efficient way to learn Revit.

4. Sweeps and Reveals will Match Wall Angle
When creating sweeps and reveals on a slanted walls, the elements will match the angle of the wall.

5. You Can Add Dimensions in Sections But Not in Plan View
If you go to a plan view and set the Detail Level to Fine, you can see all the layers of the wall. For some reason, you can’t add dimensions to specific layers of a slanted wall. Even adding dimensions to the wall is a little complicated.

However, if you create a section, assigning dimensions to all layers of the wall will be possible.

6. Use Slanted Walls with Curtain Walls
One of the most useful and intriguing way to use the Slanted Walls feature is with Curtain Walls. Like you see, even perpendicular curtain walls will match the slope.
Previously, you had to use the Curtain System feature or by using the Mass feature. While it worked, having a simplified workflow with the Slanted Walls feature is greatly appreciated.

7. Set Angle Between -90° and 90° Degrees
The angle you can set for slanted walls has to be between -90 ° and 90° degrees. As you can see in the image below, high values will produce weird looking result. Most slanted walls will be used on walls with a slope below 45 °.

Want to download this blog post in a PDF format? It is part of the brand new issue of our pamphlets publication.

This article was originally published on RevitPure and has been republished here with permission.

cover image ©


