Editor’s note: This post was originally published on BIMSCAPE's blog and re-published here with permission.
In this Autodesk Revit tutorial I am going to show you how to use the “Align” tool. If you would like to watch the video version of the tutorial first, just click in the box below…
So when would we want (or need) to use the Align tool? Let’s take a scenario of two wall instances:
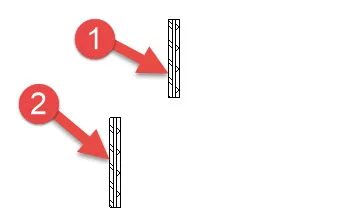
Let’s say (for example) that we want to move Wall (1) over to the left, so that it’s face aligns with the left hand face of wall (2). I will point out at this stage that the “Align” tool works with all sorts of Revit elements, not just walls.So let’s go ahead and use the “Align” tool to shift the wall over.
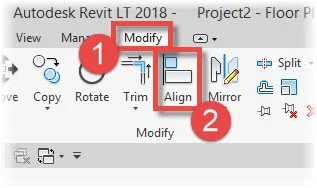
First of all open the “Modify” menu (1) and then select the “Align” tool (2):
The “Align” tool is what I call a “2 click operation” which means that there are just 2 clicks from selecting the tool; to completing the operation. Please note that the order of the clicks is very important.
The first click should be on the element you wish to align “to”
The second click should be on the element you wish to “align”- i.e. the one that will actually move.
So in the image above we would:-
Select the “Align” tool from the menu
Click on the left hand face of wall (1)
Click on the left hand face of wall (2)

As soon as you’ve made your second selection, Revit moves the right hand wall over to the left and aligns the faces as per your instruction. It also immediately displays a small padlock icon between the 2 elements. This represents a potential “Constraint”. Notice how the padlock icon is shown “open”. This tells you the constraint has not been activated. If you’d like to constrain the alignment of the 2 wall faces- i.e. ALWAYS keep them aligned- simply click on the padlock icon to form a constraint.
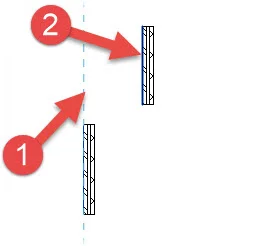
But what about if the 2 faces you wish to align are not parallel to start with? No problem- the “Align” tool can make them parallel AND Align them all in the same operation. Take the 2 wall instances in the image below:
We simply the use the “Align” tool as we did in the first example- that is, click on the wall face you wish to align “to” (1, in this case) and then select the wall face you wish to align (2, in the above image). Revit will rotate wall (2) as it aligns it with wall (1).
Let’s now take a look at what options are available to you (on the Option Bar) when using the Align tool.Go ahead and select the Align tool and take a look at the Options Bar:
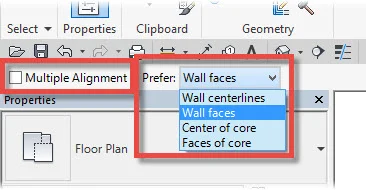
On the left hand side of the Options Bar, you have a “Multiple Alignment” tick box. This allows you to select ONE plane to align “to”; and then MULTIPLE elements/planes to align. This saves having to reselect the “Align” tool again with each instance that needs aligning. This can be seen in practice in the image below:

I have selected a face on the second wall from the left as the plane I wish to align “to”. With “Multiple Alignment” checked on the Options Bar, I can now simply click on a face on ALL the remaining wall instances and have them align to the dashed blue line.
Also on the Options Bar is the facility to state your preference with regards what Revit will detect when selecting faces / planes- You can choose Wall Centrelines, Wall Faces, Centre of Core or Faces of Core.
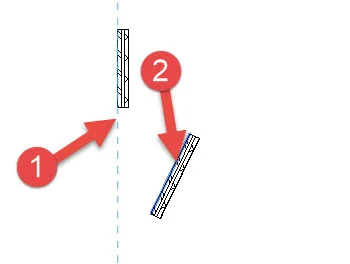
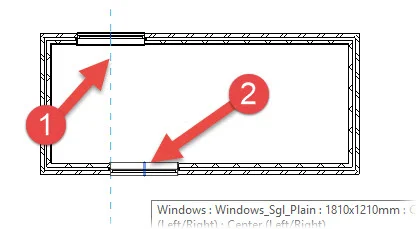
At the start of this tutorial I said that the “Align” tool works on many types of elements, not just walls. The image below shows a scenario where you may wish to align the centrelines of 2 windows located on opposite walls. The “Align” tool can be used to facilitate this. Remember that the order of your 2 clicks is important. So if window (1) is to stay in it’s current location, ensure that you click it first (after selecting the Align tool). Then select the centreline of window (2). To do so, simply hover close the centre of the widow element and Revit will display the centreline reference as a light blue vertical line:
Key Points:-
The Align tool can be used on a variety of Revit elements
Click on the element that is NOT moving, FIRST
Constrain the alignment by clicking on the padlock, if you wish Revit to ALWAYS maintain the alignment.
Editor’s note: This post was originally published on BIMSCAPE's blog and re-published here with permission.