Editor’s note: This post was originally published on the EvolveLAB's blog and re-published here with permission.
It has long been a pain point of mine that we have not had a way to convert SketchUp models to Revit. We have seen tools that convert a SketchUp Mass to a Revit Mass, or the ability to convert SketchUp Furniture to Revit Furniture, but never the shell of a building which is the most common elements that Architects and Contractors use SketchUp for. In this post we will look at how to convert a SketchUp model to REAL Revit components including walls, doors, windows, roofs, and curtainwall.
1. Download Helix. Helix will give you the ability to convert SketchUp files to Revit components. You can get a free trial of helix here.
2. Launch Helix. Open Revit, and launch Helix from the EvolveLAB tab.

3. Sync your Revit library. Syncing your Revit library will give you the ability to map your firm's native content in SketchUp.


Initiate Helix in Sketchup.

4. Map your walls. Right click any orthogonal wall, and click "Send to Be Mapped". Note that you only have to map one surface of that material. Once that material has been mapped, all walls with that same material will be mapped.

5. Map your roofs. Right click any roof, and click "Send to Be Mapped". Note that you only have to map one face of that material. Once that material has been mapped, all roofs with that same material will be mapped. It's worth mentioning that there are some limitations based on how Revit wants to sketch roofs. You will have better success if you build your sketchup roofs/material foot print with the Revit closed boundary footprint in mind.

6. Map your windows. Right click any window component, and click "Send to Be Mapped". Note that you only have to map one window of that component. Once that component has been mapped, all objects of that same component will be mapped.
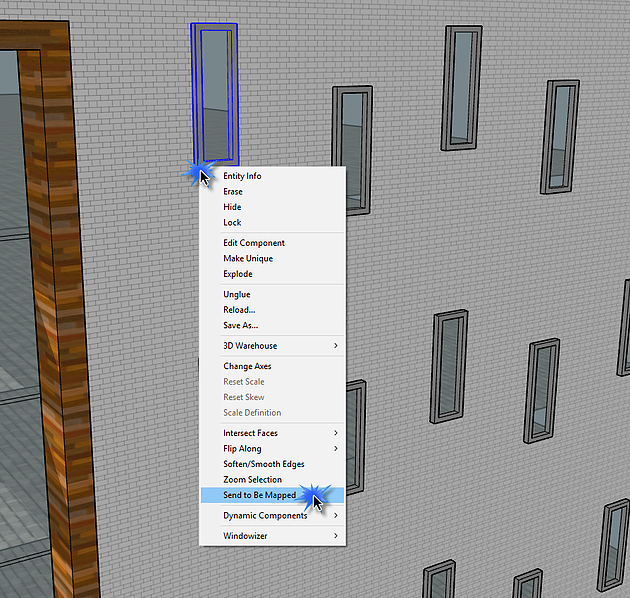
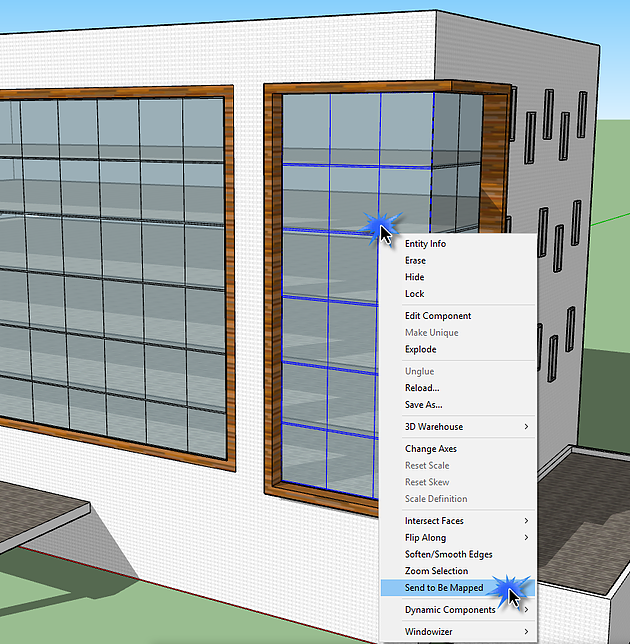
7. Map your Curtainwall. Right click any curtainwall component, and click "Send to Be Mapped". Note that you only have to map one curtainwall of that component. Once that component has been mapped, all objects of that same component will be mapped.
8. Map your Doors. Right click any door component, and click "Send to Be Mapped". Note that you only have to map one component of that door. Once that component has been mapped, all objects of that same component will be mapped.

9. Assign your Revit types. The components and material faces by default will be in the "Uncategorized" group. Simply assign that component or material face to the appropriate category.


10. Assign your types. Now that the categories are correct, you can assign the appropriate Revit types. Since you have assign the correct category, the Revit types are readily available for you to pick from.

11. Create Levels (if desired) Helix also gives you the ability to bring levels across into Revit. Simply "Add Level", and move the planes to where you want them. These planes represent the levels that will be create in Revit from SketchUp. Note that it is not necessary to perform this step, but is helpful if you want windows, doors, etc. associate to their appropriate level.

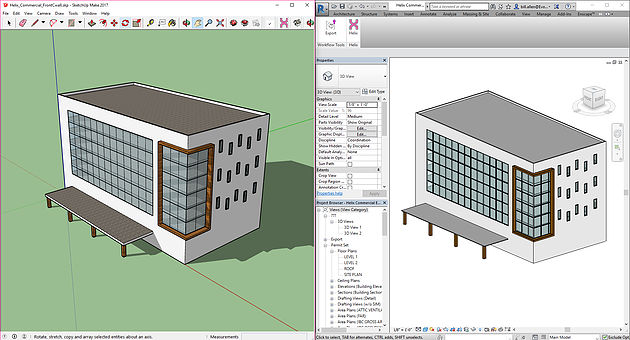
12. Export From SketchUp To Revit. Click Export

13. Import SketchUp To Revit. Click Import


13. Enjoy. Watch Revit literally build your model before your eyes...
To learn more about Helix or to try it for yourself, please visit evolvebim.com/helix
Editor’s note: This post was originally published on the EvolveLAB's blog and re-published here with permission.

